Tapping In to Get “Sapped” Out
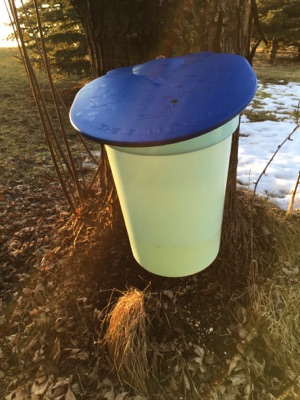
It’s almost spring in Minnesota and the winter has been really mild this year. We are out and about doing our Saturday stops getting our shopping and chores done, when we noticed the small farmstead property has their blue maple sap bags hanging. We thought it was kind of odd and relatively early, however, after coming home and doing some research, maybe they weren’t too early at all.
We’ve always thought of tapping maple trees for syrup, but really didn’t know that much about it. We thought you needed a specific maple varietal (sugar maple) otherwise, forget about it. It also needs a bunch of other equipment to collect and boil this stuff down. So we have always have hesitated. Plus, our timing on this is always bad. We see it, don’t act on it, and then the season is over to do anything about it until next year. The same missed cycle happens again the next year.
Fortunately this year, my beautiful significant other decided to take action, buying some very basic equipment in order for us to tap the handful of maple trees we have on our property. I kind of laugh at first, because our winter was going quickly to Spring and I thought we missed our opportunity when the spiles (the things that you tap into your tree) and the collecting buckets showed up on our doorstep. She didn’t tell me she was ordering, so it was a surprise and I thought, what the heck. It fits with everything else that we are doing on the property.
She ordered a kit that had 3 buckets, 3 spiles, one 5/16 drill bit and a maple sap / syrup book. That was it. So, without her knowing, I took action and did a quick read on how to tap the trees, drilled the holes, pounded in the spiles and hung the buckets. The rest of it was up to the trees to do the rest. Then, she was surprised when she drove in seeing our collecting buckets hung, plus little did she know that I hung an additional 3 collecting buckets.
Now when it comes to sap production of the trees, they need the freeze / thaw cycles of the day too produce a good sap flow. Where the temperature goes below freezing during the evening and night the trees push their sap back down into the tree and then the thaw cycle of the afternoon draws the sap back up into the branches. Pretty basic fluid flow principles. The trees will produce or “bleed” a good sap until the tree buds out. Then, the flavors of the sap change enough to where its not good and the sap collection is kind of done.
The other thing that is interesting is that you can tap other trees besides sugar maples. Silver maples don’t have as much sugar content in the sap, so it will take more sap to produce syrup. You can use other maple as well and they will give a different taste profile. You can tap Birch & Box Elder as well. Since they give a different taste profile than Maple, you might want to keep those separate as you experiment.
We learned was a little history about the importance of syrup. This was a huge source of calories for the early settlers that could be stored. Think back to our North American natives who probably tapped into this source of calories, but probably had challenges of boiling or reducing the sap into a syrup. Let alone the challenge of storing it on the shelf for later use before spoiling. The settlers that had large boiling pots and glass jars probably benefited the most and that is why Vermont’s syrup became so famous. The cottage industry there provided a stored food source for all the east coast and they learned how to refine the syrup in to a dried confection that could be hauled without the concern of breakage or spoilage. Finding edible calories for these early settlers was a big deal. Many settlers didn’t fair well without the caloric levels needed to exist. So maple syrup production was pretty significant back then for survival and enjoyment.
Anyways, I had the trees tapped, the weather, while not ideal, was still in the target zone for sap collection. At first, I didn’t see much, then the next day coming home from work, there is almost a half a bucket load. I grab a 5 gallon bucket and fill up that one, plus half of another. I have to admit that I am impressed with how easy that was. Now I have 7-8 gallons of sap and a commercial refrigerator and in it goes. They say you can keep sap for 4-5 days as long as it stays refrigerated. The next day I collect about another 5 gallons and a couple of days later, about another 8 gallons. My refrigerator is filling up with buckets of sap, which is good, however, we have no plan on what to do with it.
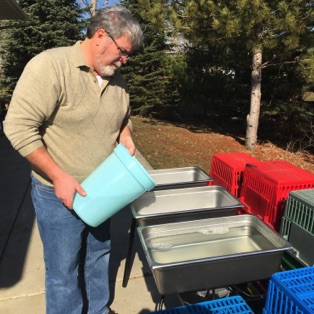
Early Saturday morning and my wife says to me, “Now that you have all this sap, what’s your plan.“ I said, “I don’t have one.” I wasn’t ready to deal with that. That is the boiling process. Shoot, I just got the buckets hung on the tree and still feeling good that I am drawing sap from these less than ideal silver and red maples. Like our 25 year relationship, we quickly make breakfast, chase it down with our coffee and both of us are doing research to see what will work for us and something that we can purchase and start boiling by noon. Nothing like a plan, let alone, having the plan implemented by noon. I am thinking what are we going to do. She takes off in her search direction and I do the same. I go out to Mother Earth News, she is checking out Pinterest. We see all sorts of home-made backyard to commercial engineered designed contraptions. I’m thinking cheap. She’s thinking implementable by Noon. What we came up with is using evaporating pans that are used in restaurant buffet serving lines and a propane three burner camp grill. Fortunately, we live in the Twin Cities metro so we found a Commercial Kitchen Retail outlet for the Stainless Steel Evaporating Pans and one of the big box outdoor camping stores that rhymes with “She’sExpectingSyrup-by-NoonBigFella”. So fortunately the BigFella store had the 3 burner propane camp grill. The only thing else I needed was some extra tanks of LP gas.
We got back to our winery where we had the sap buckets and the press pad where we press our grapes to start the boiling process. The grill set up easy, the LP (liquid propane) tank screwed right on, the evaporating pans set really nice on each burner, and sap got poured in the pans. We lit up the burners and we were boiling sap…….for the next 12 hours. No big deal, we had some clients who stopped at the winery. It peaked their interests. By the end of the day, which was was perfect, the wine glass was calling our name at the picnic table. So at 11:00 PM, the 35 gallons of sap had boiled down to one evaporating pan. Now mind you, we got everything bought and were boiling sap at 11:30 AM (30 minutes ahead of schedule) and we had cooked this down and had gone through 2 - 20# LP tanks in the process. The only thing remaining was to take the 2 gallons and sweet sap and cool it off and do the remaining control boiling the next day. The only thing remaining was to pour the unfiltered sweet sap into the stock pot. That is where we did our first filter and then put that in the refrigerator to let the heavy sediment settle to the bottom over night.
The next day we went to pull the stock pot from the refrigerator and notice the sweet sap had thickened nicely and the sediment did go to the bottom. We then filtered that again and was ready for the control boil. It’s really important at this point to read up on what you should do and not do. What you don’t want to do is to over cook that sap. You want to sneak up on a nice 219 degree F boil. We used a candy thermometer for a while, but then switched over to a digital meat thermometer. It was easier to read. The only you want to do is to calibrate the meat thermometer to your candy thermometer. They can vary. The other thing to do is to taste the syrup as it approaches the 219 deg F. What I found is that a froth will appear as you get close to 219 deg F. In our case, the froth appeared at 217 deg F. Taste the froth. I found that the froth had a scorch taste to it. I immediately removed it from the heat. I skimmed all that off the syrup and called it good. What you don’t want to happen is to scorch the sugars in the syrup, otherwise, all those hours of work and boiling go out the door or down the drain.
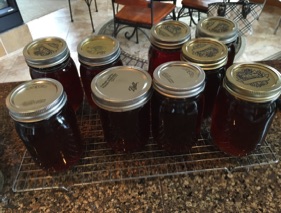
It’s hard to judge the viscosity. There are syrup hydrometers and other things that you can buy, which I did, but lost them in my “Neil Bahr haste” moments of misplacement. They’re around somewhere, but where is the question. Hence, back to the Meat Fork Thermometer. Anyway, the rest is pretty standard canning practice. For us, we just had some Mason or Kerr jars in our canned goods area of the basement and took them through the sterilization process and had them ready before pouring our 185 deg F syrup into them.
So our experiment netted a little over 9 pints of homegrown, homemade, and hand canned of pure sweet delight. The end result was great. We compared ours to the top shelf syrup we buy at the store. It tasted better. Honestly. We high-fived ourselves with our joint efforts and laughed about the whole process and how much we spent. However, part of our journey is investing in ourselves and giving us permission to try. We think there is a payback. After all, our 9 pints cost probably ~$75 if we were to buy them in the store. And if we would have gotten in front of the sap flow, we probably could have gotten another 20 gallons of sap. And only 5 of the 6 trees tapped really only produced any sap. Which means that we might have gotten another 4 more pints. Let’s say we might have gotten $100 worth of syrup. Our investment was $190 for the 3 burner grill, $90 for the evaporating pans, $35 for the gas which you add another $15 for the extra sap if collected and boiled. All in it looks like $335. So in 3.5 years, we will see the return on our investment and wonderful stacks of pancakes, waffles, and meat dishes laced with our maple syrup experiment.
It was by far our yummiest experiment so far that we can’t wait to open each of those jars.
Who knew that understanding how to tap into your surroundings could produce such a wonderful experience.
Cheers!